Hawk Model Company’s “HoDad Makin’ the Scene with a Six-Pack” plastic model kit from their Silly Surfers line.
I added “HoDad” to my stack of after perusing the company’s older, wackier offerings. This kit looked equal parts simple and fun to me – and so it turned out to be. It offered lots of opportunities for modification and customization but I mostly stayed within the kit’s lines.
Modifications To The Kit
One of my first changes was the obliteration of the model’s title in the “sand” of the base with a generous amount of airplane putty. The piece is already well across the line for 60’s-era cash-in schlock and I felt the words took it one step too far. Off you go.
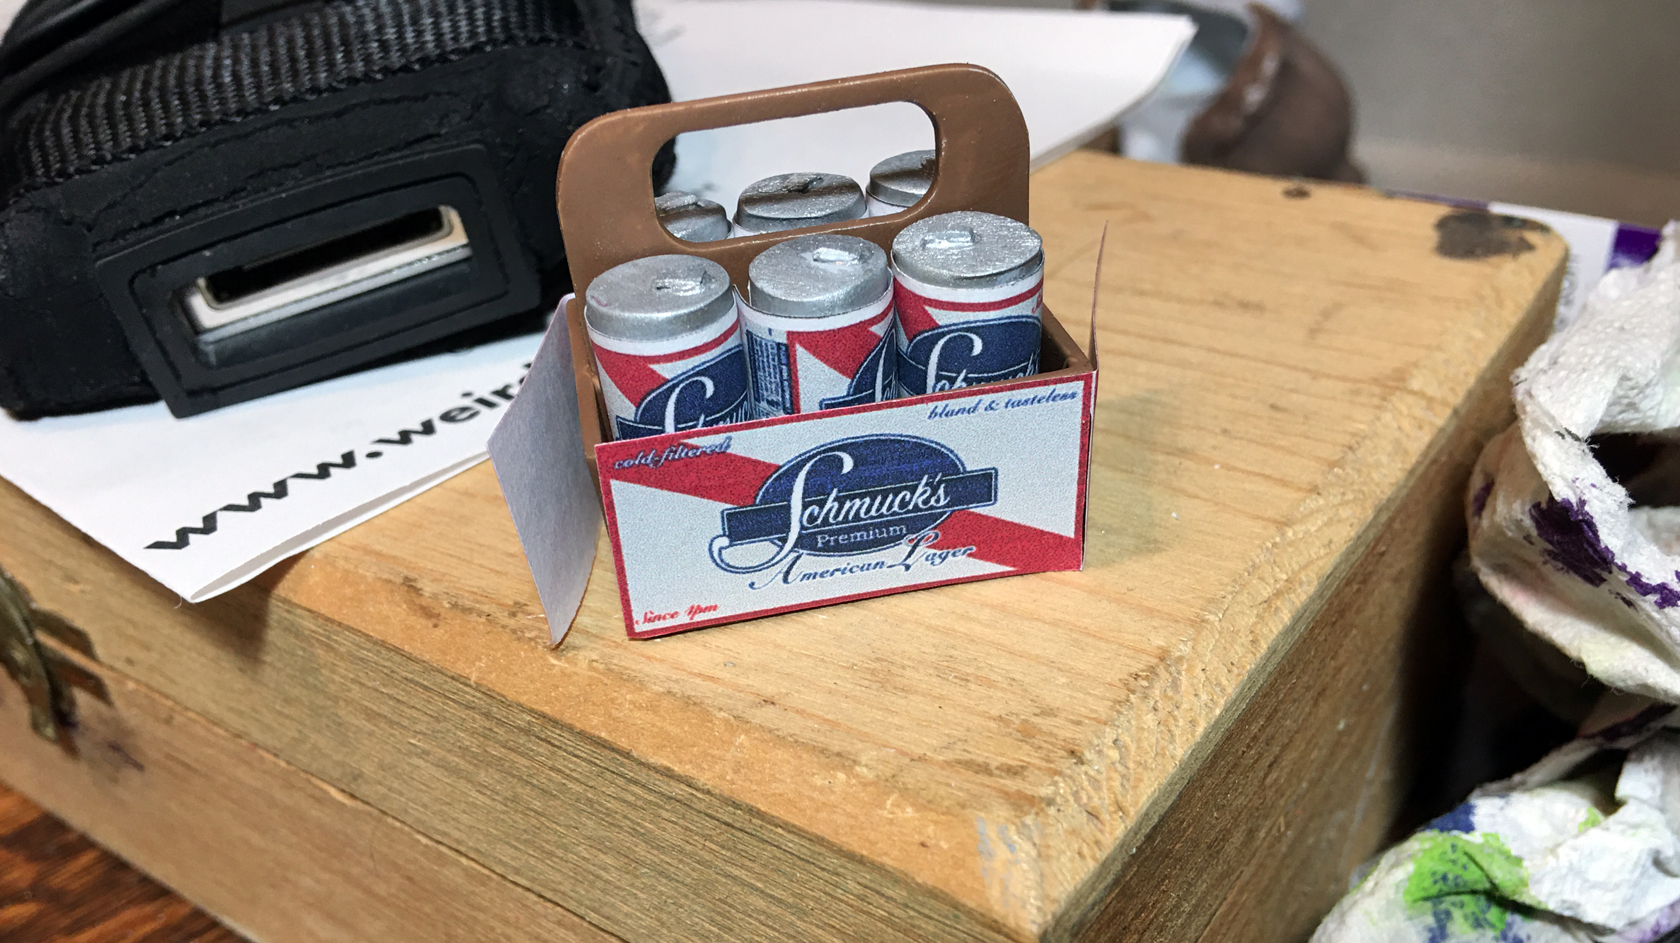
The next thing I was most excited about decorating was the 6 pack. I originally imagined printing up a label of a beer that I enjoy, such as Deschutes Black Butte Porter or Fremont Lush. The more I thought about it, however, the more that felt wrong.
 Let’s face it – HoDad is a doofus. He’s not gonna appreciate – or at least pay for – good beer. Thus, I decided to brew him up his own brand: Schmuck’s Premium American Lager. The label also proclaims “cold-filtered,” “bland & tasteless,” and “Since 4pm.” Mmmm – delish.
I printed the labels for the cans and carton on basic printer paper, then affixed them to their targets using Mod Podge. I sprayed the cans with many layers of gloss clear coat, the carton with just a few of flat. No ink runs – yahoo!
Another decision was to paint HoDad’s smoke up like a big, fat doobie. The box instructions/art refer to it/depict it as a stogie – but what the model’s holding don’t look like a cigar to me. Nossir, it looks exactly like something Tommy Chong would roll up and wedge in his pie hole – so that’s what I painted. I toyed with adding a wisp of “smoke” but decided the slight red of the cherry at the tip was enough.
The other big modification was the decision to add actual sand to the base instead of trying to paint the effect. I affixed the sand in place with a Mod Podge undercoat and a liberal topcoat of thinned PVA glue solution.* This is the first time I’ve tried this method and it worked like a charm.
Customization or Correction?
Many of the modifications I made to the kit involved fixing some of its shoddiness. While the over all kit is generally pretty solid, there are definitely a few join-up issues.
Where the legs connect to the body, for  example, is insuperably bad, requiring lots of puttying and shaping. More than I’ve ever had to do for a kit before. Terrible.
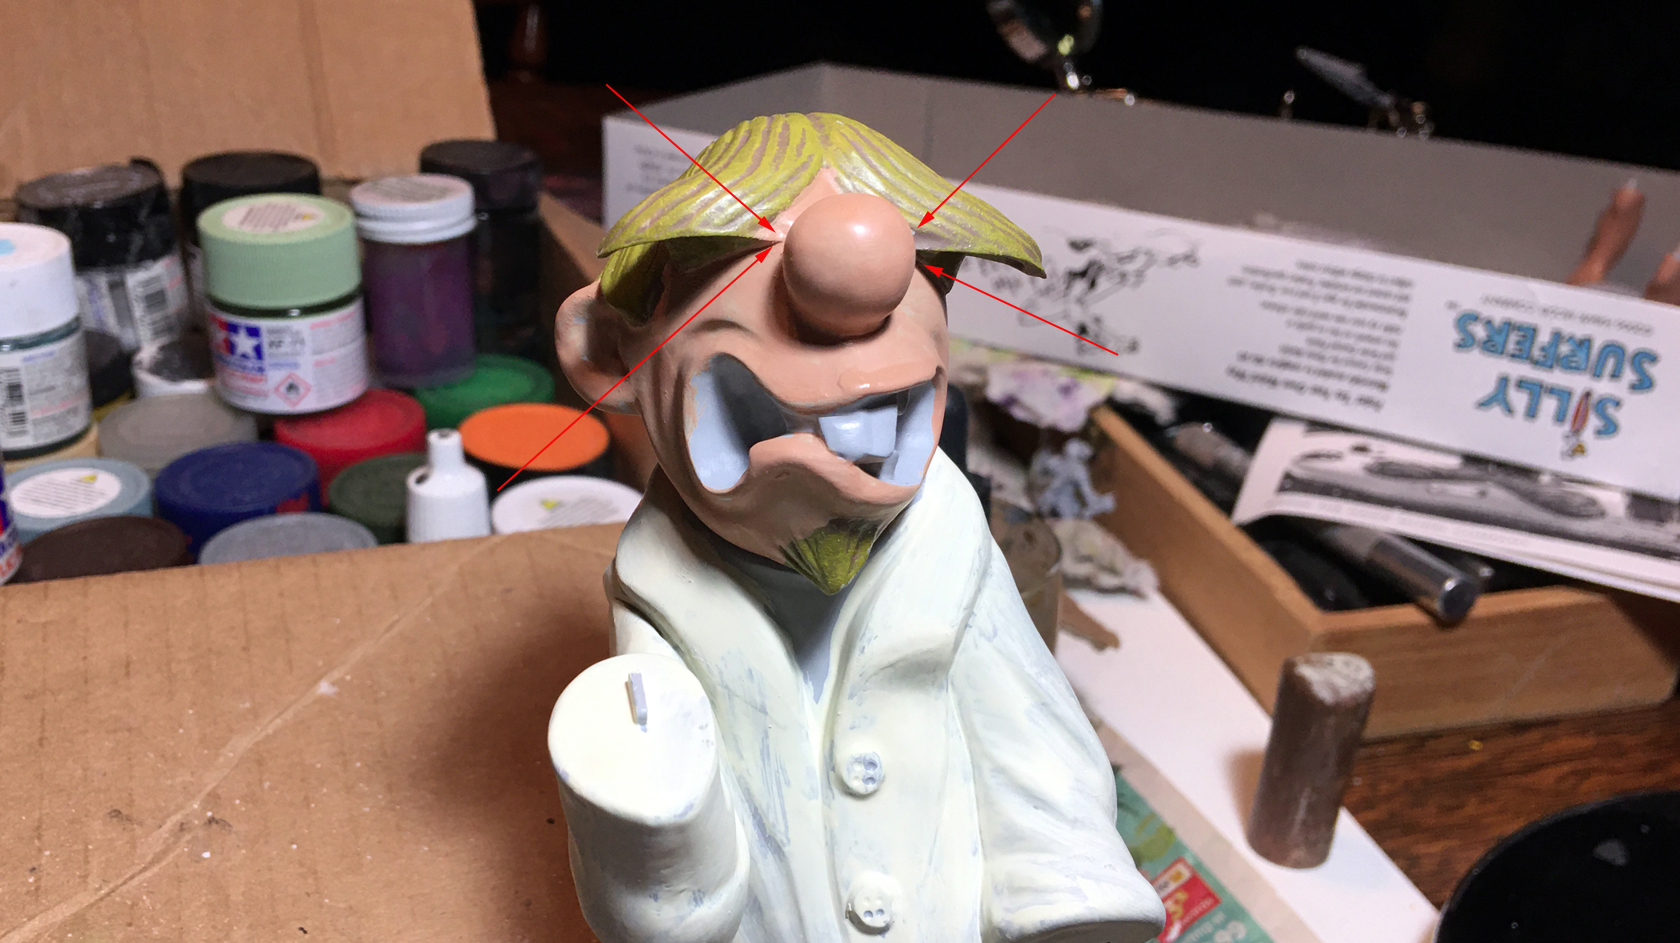
So, too the piece that makes up the bangs, brow, and hair on top of HoDad’s head. This piece ran sharp and straight where it joined the gentle curve of the face below in frustrating obviousness. Puttying and filing was necessary for a smoother, more natural looking transition from cheek to forehead.
HoDad Makin’ the Scene with a Six-Pack
Overall, “HoDad” is a fun piece and, as I said at the top, ripe for customization.
I’m not exactly sure where I’m going to display this decidedly PG model, with its alcoholic litter and honkin’ jay, but there you have it … daddy-o.
*PVA Glue Solution:
1 part PVA glue (elmer’s, wood glue, school glue – white, non toxic, yadda yadda)
2 parts water
1) Stir then shake the mixture together until it has the consistency of milk.
2) Elevate your piece so that it can drip freely, then gently brush a liberal wash of the PVA solution over your pre-affixed landscape. Emphasis on gentle – the solution will gradually loosen the previous base coat fixative before it hardens.
3) Allow the excess to drip off.
4) Dries best at room temperature. Forms a tough, invisible shield that helps hold everything in place on the otherwise finicky plastic.

Hi – Came across your version and wanted to share my own. I’m a new blogger and am looking for feedback (hard to come by as a new blogger!) Please share your thoughts about my writing style in general, and about this particular one specifically.
https://amiddleagedkid.com/surfs-up/
Thanks
Toph