It was a chance meeting between a visit to the thrift shop and a hunt for cake-toppers that led to this.
First, I ran across a display dome and base at the local Goodwill. I’m always on the lookout for these glass bells because, like a nice hat, I like to display things under them. And this was a big’un. All the others I’d scored before were smallish – just under 5″ x 3.5″ – this mama is closer to 9″ x 5.5″! Yow!
I brought it home, peeled the tape and price stickers off of it and set to work figuring out what to put under it. A Japanese monster toy? Found object sculpture? A bell this size had me thinking of some wizened mutation in dessicated flesh but I already have a dead bat and a rat’s face under glass so it was better to do something different. I was going to have to think on it, to wait for the right thing to come along.
Meanwhile, my wedding was creeping up on me. Every day, my fiance was bringing up some other handful of details regarding plans for the ceremony: creating invites, renting tables, shopping for dresses, networking friends. Me? I’m thinking of what to put under a glass dome. What a guy.
Anyway, yeah. She planned most of the wedding and really asked very little of me but, of course, I was involved beyond the “I do” part. One of the many things I was involved with was the search for appropriate cake-toppers.
We didn’t want the same-old thing but we didn’t want to go totally goonus, either; no bobble-heads need apply. We looked at cut outs, we looked at toys, we looked at porcelains, we looked at carving our own, we looked at modeling figures … and then I saw it.
We were perusing miniatures online and sending each other tongue in cheek suggestions via instant message regarding them – “Here, this one for you.” (a woman wrapped in a towel) “Okay – and this for you.” (a vampire) – when I saw the figure in question, a tiny rendering in plastic by Preiser. The minute I saw it I knew I had to have it – even at the ridiculous price of $6.99 *before* shipping (for an HO scale figure?!?).
You may have figured out that I collect a lot of weird crap. I do. I know my weird crap – and this was right up my alley.
After ordering the figure my mind wandered – where would I put it? It would be funny just about anywhere, particularly where you least expected to find it. I initially imagined it as just another item on one my shelves, tucked in between a couple of found objects, but then it occurred to me. Why not go whole hog and create a diorama?
30 or so years ago I made a diorama for a school project using a plaster base, some paints, a couple of D&D miniatures, and the like but that was it. Could I still do it? What did I need to proceed?
I scanned the internet for ideas, tips. There was plenty but almost everyone had you buying a bunch of pre-made shite. I didn’t want to do that. I wanted to do this as on the cheap as I could and I wanted to do it fast because *this* engine often runs on impatience. Besides, I wanted it ready by the wedding.
I started poking around my garage and decided, using advice from the internet and materials I had on hand, I could do it.
The first thing I did was to dig around in my craft crap and, sure enough, there was the old Sue Bee spun honey tub filled with the fake grass I’d used for that diorama some 30 years prior. See? I really *was* saving that for later. Who says it doesn’t pay to be a pack rat?
Next I needed a tree – my diorama had to have a tree, didn’t it? I went outside and wandered around looking for the right woody twig. Finding one one, I carefully snipped away all the leaves and set about trimming the parts that didn’t look tree-like to me. Ten minutes later I had a miniature, naked tree in my hands (a fact that’ll get you arrested in 26 states, I hear).
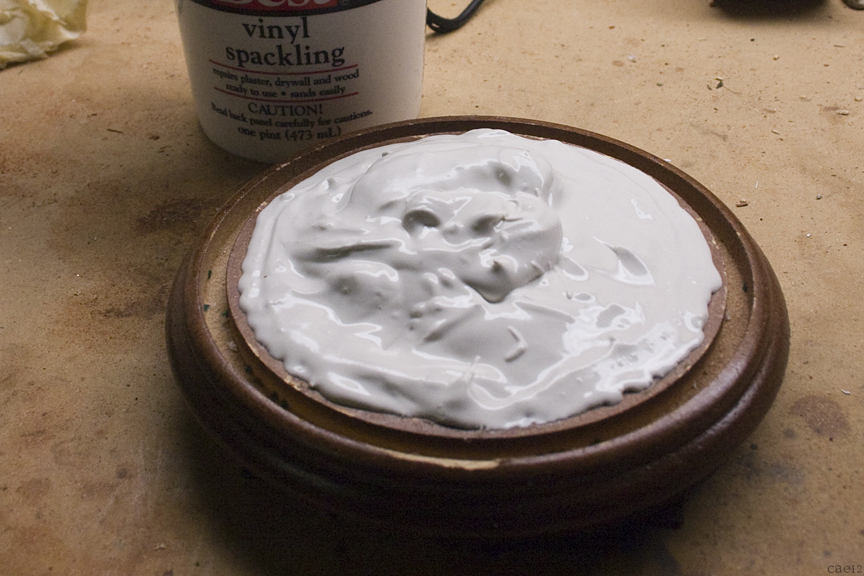 Now my foundation. I looked at the wooden base of the dome. Online, all the advice I read counseled careful planning of the landscape with often intricate methods of building it up from foam, paper, wire mesh, or like items. I knew what I wanted: a slight hill. Who needs wire mesh and careful planning? I shrugged and plopped a healthy dollop of spackling onto it, smooshing some of it to one side thinking: “promontory.”
The online how-to’s also suggested painting the cured surface of your diorama prior to adding anydecorative materials. Hmm. Interesting thought. Probably a really good idea. Instead, I pinched up portions of the fake grass material and began sprinkling it like the heinous liberal I am over the face of the still-wet spackling. When it was fully covered, I gave the surface a few light pats and went to bed, a smile on my face: done!
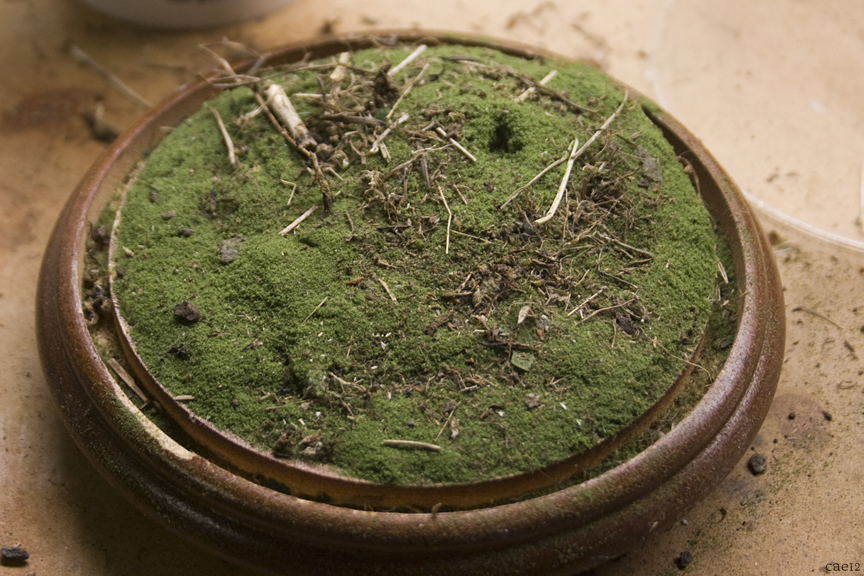 The next morning I tested the greened spackling and it was nearly dry. I turned the base over and blew on the grass – the excess fell away leaving a really convincing grassy surface behind. Awesome! I ran outside and grabbed some dirt and woody crap, throwing it on the base to add contrast. Fabulous!
Now the tree: what the hell was I gonna use for leaves? Or should I just leave (no pun intended) it bare? I returned to my internet diorama gurus once more. One sage fellow suggested tearing green scrubby-pads into little puffy bits for leaves. The pictures online looked convincing, so I decided to try that method. Unfortunately, the only scrubby I knew of in the house was all beat to flinders by its interminable tour of duty in the kitchen. When my girl told me she was running to the market, I added green scrubby pads to her list.
The ones she brought home looked great until I tore out a few puffs and held them up to the tree: way too blue-green! Gonna have to paint it, grumble grumble …
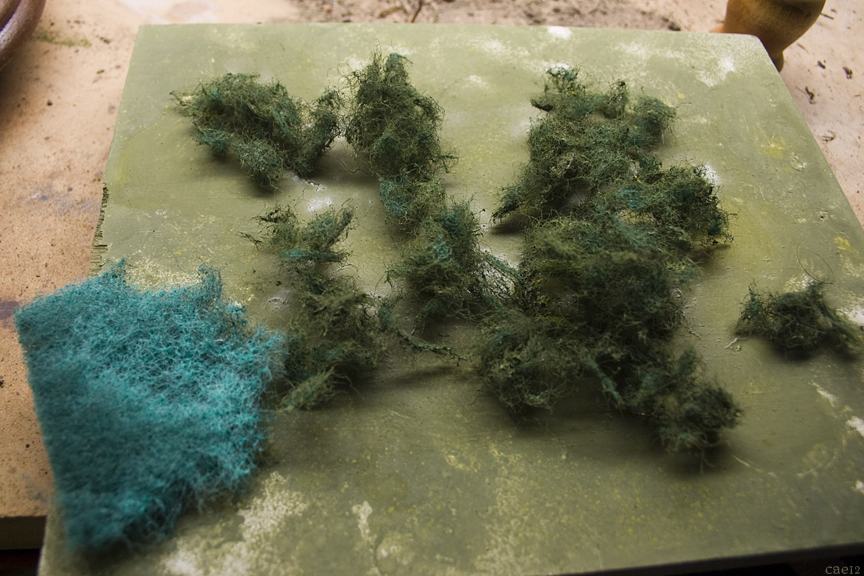 Digging around in my decade-old model paint supplies, I discovered a spray-bottle that still had about a half-inch of olive green in it; something I’d mixed up for a Gundam mech – and it was still fluid! Huzzah!
I finished wrenching the scrubby-pad into gnarly little puffs, then sprayed, turning the puffs over again and again, until all the paint was soaked up. After this dried, I dipped a toothbrush into some Tamiya mustard yellow and proceeded to stroke the bristles to generate a random spray of earthy yellow into my “leaves.” Can’t have ’em looking too uniform, can we? It came out way better than I had expected.
When I tried positioning my naked tree in the grass base, though, I realized that my hill was pretty pathetic. It needed more elevation. Would anything stick to the fuzzy “grass” and dirt surface that barely adhered to the lump I’d already created? Shouldn’t I clean the loose-ish particles off before I began anew? I shrugged and, wadding up a chunk of used paper towel for mass, began troweling on more spackle. Hotcha.
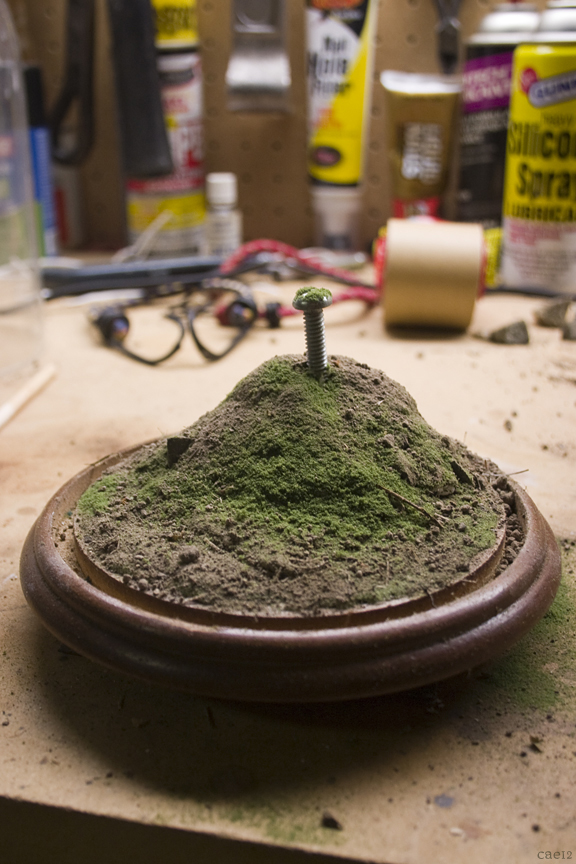 Having built up the hill, I determined the proper placement of the tree and marked it with a bolt down the center, which also helped keep my oozing addition in place while it dried. Scrounging around in the driveway, I collectedmore promising dirt and rocks, which I added to the still wet mound along with more faux grass.
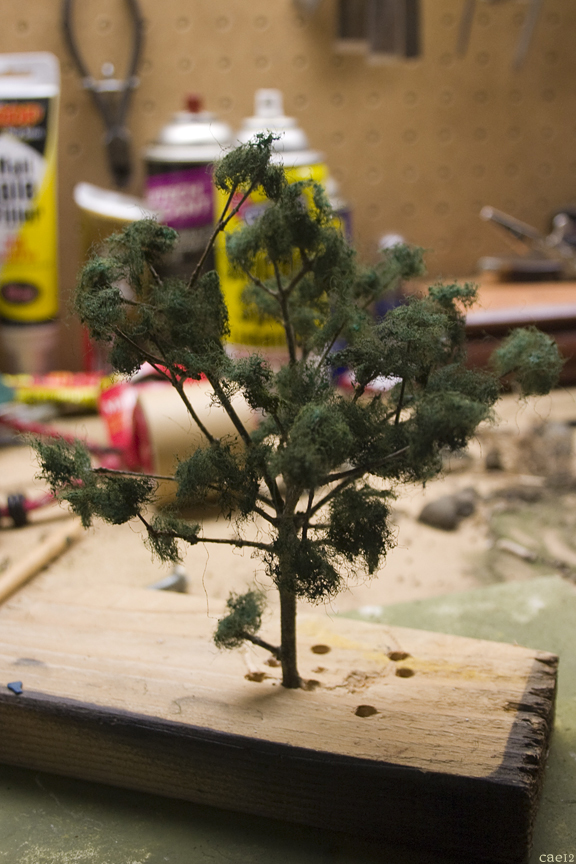 Then it was back to the tree. Wedging the trunk in a unrelated, pre-drilled board I had lying around, I commenced to gluing my “leaves” on with Elmer’s. In short order it was looking pretty good. Not just good but good enough.
Throughout the days-long process of creating this diorama, I would go to bed at night filled with ideas for the next day and then hurry down to the garage upon waking to revel in the effect of the night’s drying. Every morning was Christmas morning!
But, not always a happy Christmas morning. Sometimes the Grinch stole progress …
The day after I added the “hill,” I was quite pleased until I turned over the base to blow off the excess. Much of what fell away *wasn’t* excess and I was left with lots of white showing through. Further, the seam between my initial layer and the new addition was quite obvious (der!). I tried another quick fix with the Elmer’s glue I’d used for the tree but the results were not good: the end result looked as if I’d used Elmer’s glue to try and hide a seam. Great. Back to spackle.
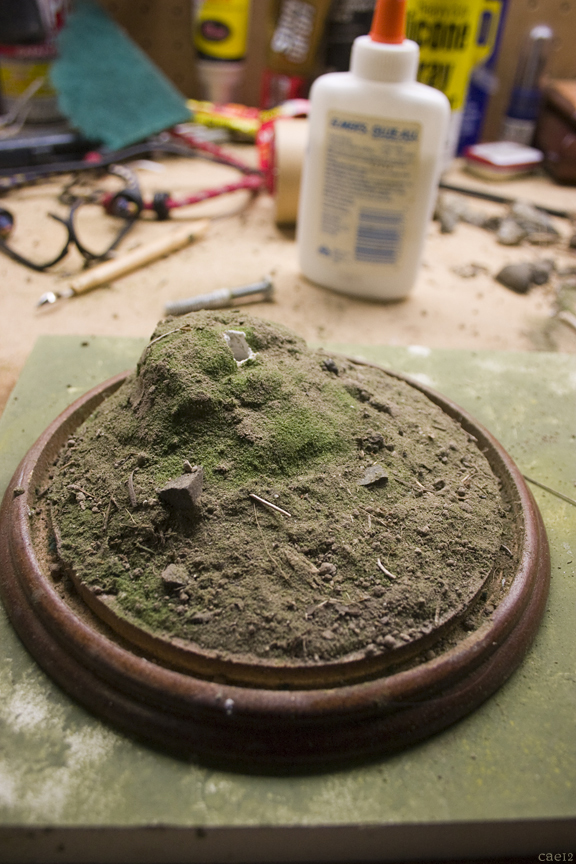 Ten minutes later, things were back under control and looking good – I really liked the large “boulder” I’d left protruding out of the side of my hill. I gave my project the rest of the day to rest and recuperate.
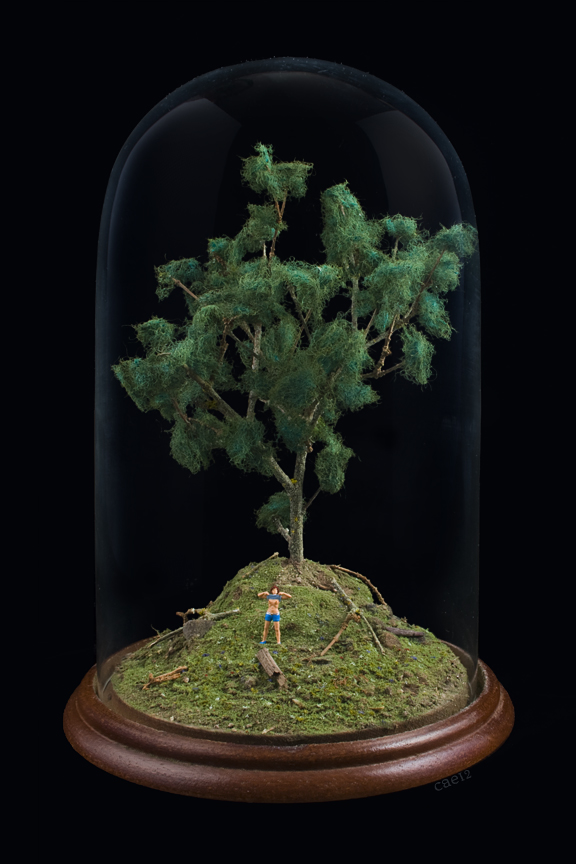
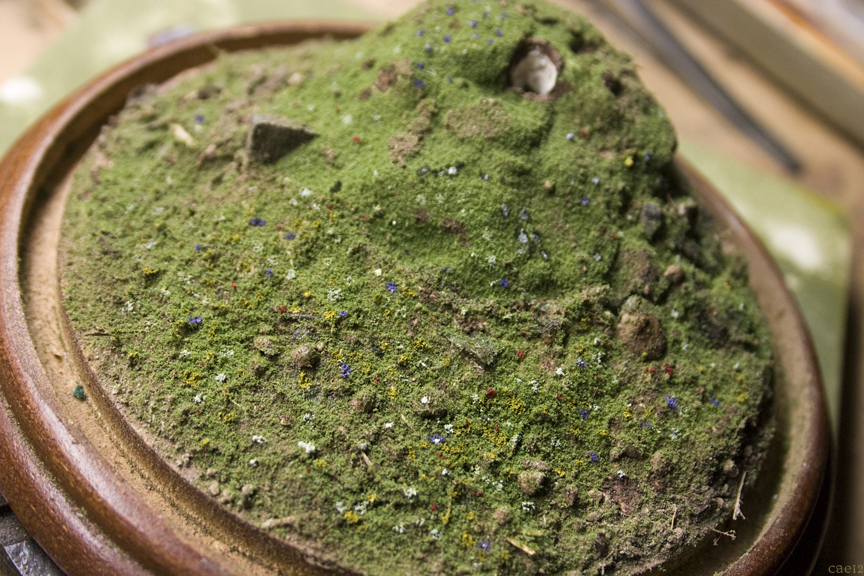 The next day, things were looking a lot better but there was still a lot of white showing after the turnover. I decided -screw it! – I could use some Tamiya flat brown to touch up and it worked well, not at all glaringly “painted.” Then the idea of little spots of color indicating clusters of wildflowers hit me. Using the aforementioned mustard yellow, along with some flat white, flat red, and a custom purple I’d mixed ten years prior for a Gundam Rick-Dom model, I began to add little specks of careful color. I really liked the results but admit I may have over done it – probably I should’ve just stuck with the white and yellow – but they helped support the title I finally settled on for the piece: “Flashes of Spring.”
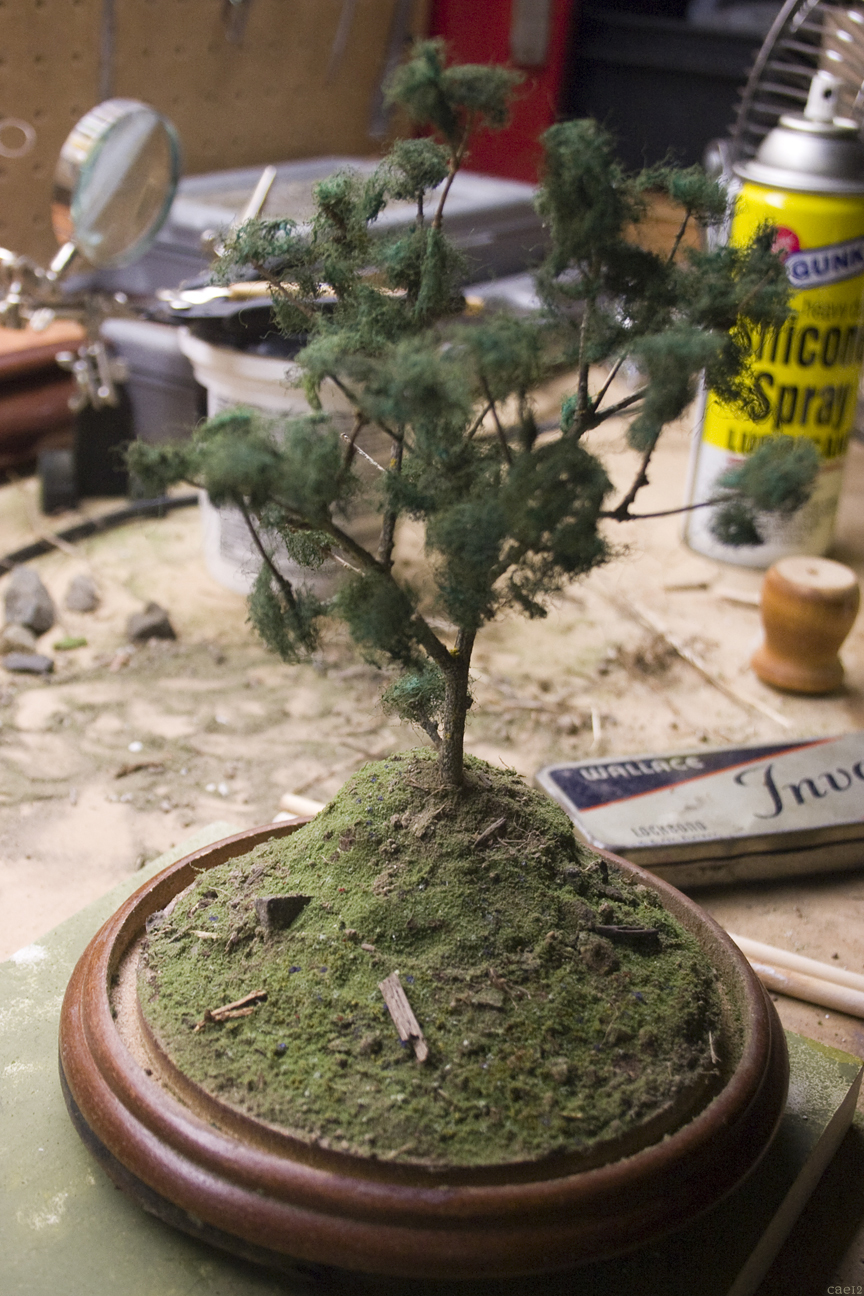 Now I was ready to add the tree – this took a lot of patience because the dang thing did not want to stay in the socket I’d provided. I had to prop it up with sticks over night and even then it was wobbly. Building up the collar of “earth” around the trunk was a particular nightmare as each tap either threatened to break the tenuous bond I’d already made or my tool would snag in the tangled “leaves” as I worked and threaten snap delicate branches. Ugh. After about a half hour of tweedly, though , it was in place, firm, and lookin’ good.
A few more touches of brown paint, fallen branches and logs, and it was time to add the figure. She’d been standing on double-sided sticky tape in her case the whole while and I’d been dreading the likely difficult task of affixing her teensy feet to the dusty, lumpy terrain. I needn’t have worried. She fit and held fast to the area I’d made for her as if … it had been made for her. Woo-hoo!
The last step was some touch up to the tree: trimming dangling threads of scrubby-pad “leaves” of the tree as well as trimming and reshaping branches to more comfortably accommodate the closing of the bell.
Overall, not a bad first effort, if I do say so myself. I gain immense pleasure from watching people peering in at it and then *eventually* seeing what the figure is up to in there. (and you can get a better view, too if you click through the images …)


Hi! Love your work. I was wondering where one would go about buying the figures you use. Especially the more cheaky ones. Do you make them yourself?
Hi Alex – thanks! I have since come to dislike the “leaves” in the tree and will probably redo them, someday.
As to the figure, I wish I could say I had sculpted it … but I didn’t. The brazen little lady is a Preiser, HO scale figure that I picked up off of Amazon: http://amzn.to/19H32Rl
They’re a great company, with a wide variety of figures in all scales. I hope to do more with them.
Company website: http://www.preiser-figuren.de/
EuroRail Hobbies: http://www.eurorailhobbies.com/preiser.asp
I never would have guessed that you used spackle for the base, but it turned out really nice! My son has recently taken an interest in dioramas, especially since playing some of his video games. I’ve been thinking of buying one from a professional since I’m not great at crafting things like this myself. Hopefully I can find some cool ones for his birthday!